Sunday, 27 December 2020

Julies Name Game - New Free Motion Quilting Design #165

Quilting is my “Happy Place”.
I hope you are all well and happy too!

This new free motion quilting design has been named.

The winner was chosen by popular vote,              (Facebook and Instagram) on Sunday May 10, 2020 at 6:00 PM (Pacific).

Let me introduce “Firebird”!

Thank you and congratulations to Eleni Harvalias of Parksville B.C. for suggesting this winning name.

Stitched with Superior Fantastico color 5114 and two layers of bamboo batting.

Julies Name Game - New Free Motion Quilting Design #164


 Inspired by the provincial flower of B.C. this new free motion quilting design has its name.

The winner was chosen by popular vote (Facebook and Instagram) with a little help from a random name picker on Sunday May 3, 2020 at 6:00 PM (Pacific).

Thank you and congratulations to Maureen Parsons of Nanaimo B.C. for suggesting this winning name!

Julies Name Game -New Free Motion Quilting Design #163


This new design was inspired by the provincial flower of Nova Scotia and the terrible events of April 18 -19 2020.
The winning name, chosen by popular vote                  (Facebook and Instagram) on Sunday April 26, 2020 at 6:00 PM (Pacific) is that of a different flower and completely appropriate    💙💙💙

This design is now called Forget-me-not.

Thank you to Irene Harvalias of New Westminster B.C. for suggesting this wonderful name !

Tuesday, 22 December 2020

Julies Name Game - New Free Motion Design #162


Here is another fun design for you to stitch.

Though this design looks a little complex it is actually very easy.
Stitch it on the larger side for best effect.

The winning name, chosen by popular vote (Facebook and/or Instagram) on Sunday April 19, 2020 at 6:00 PM (Pacific) is “Trillium”.

Thank you and congratulations to Sherri Mullin Dawes of Nanaimo B.C. for suggesting this wonderful winning name.


Follow these Step By Step instructions to stitch this design


The sample has been stitched with 50 weight cotton.

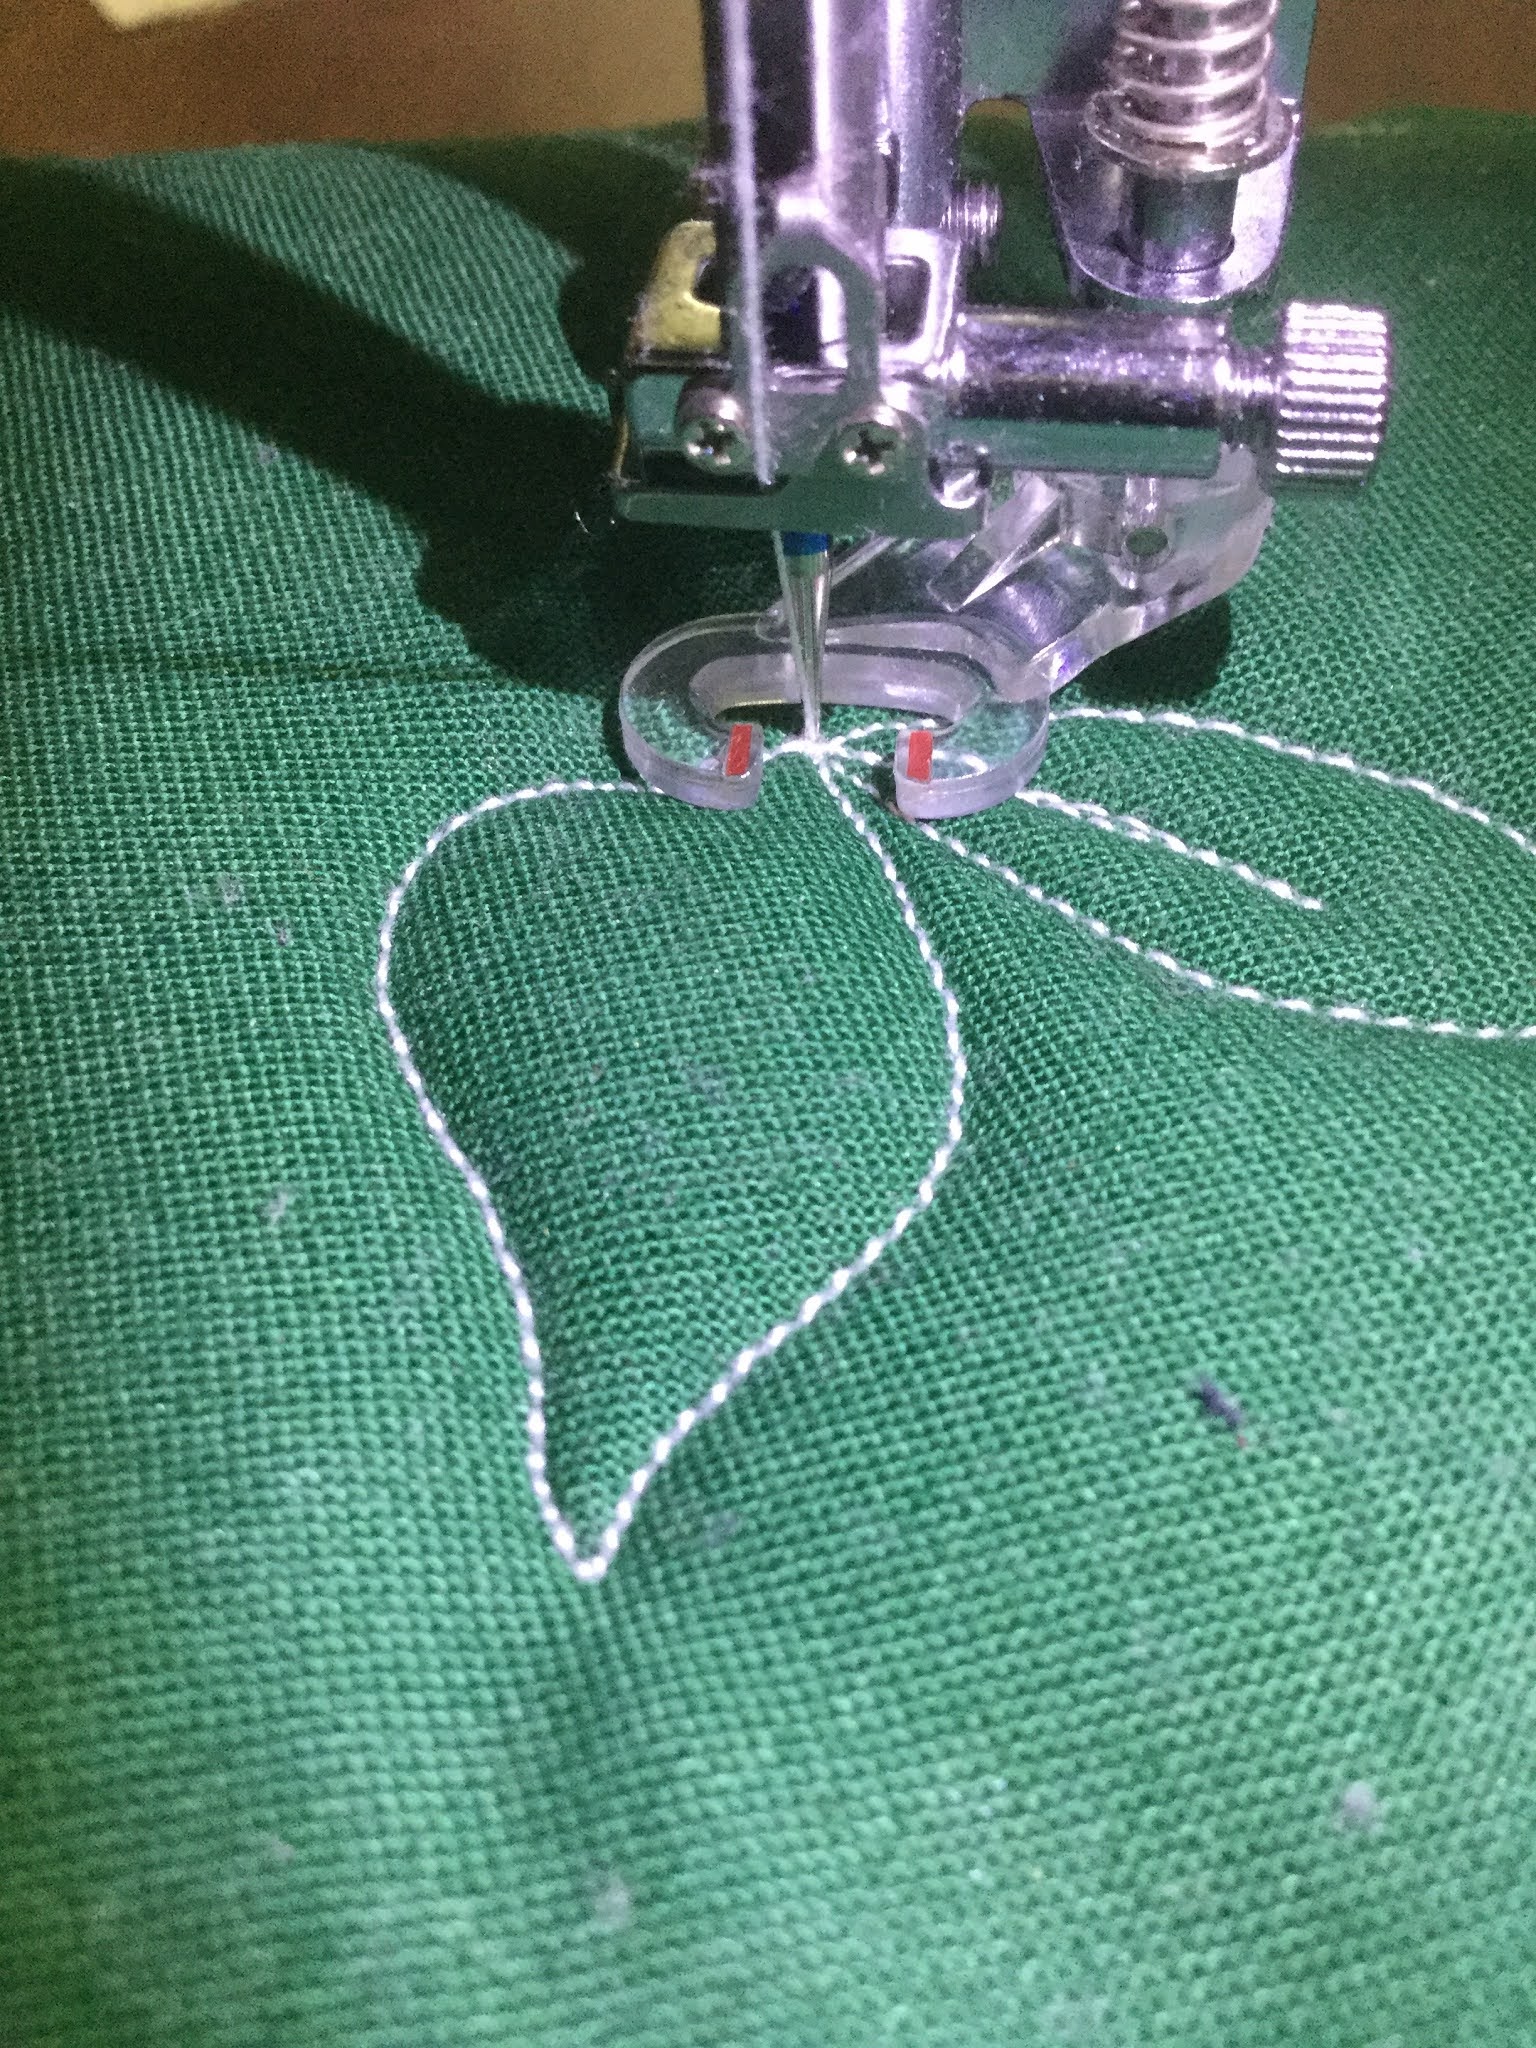
Each motif is stitched around a central point.


*Please Note 
Photos may be turned for better visibility.

1) From your start point, stitch a gentle arc. 


2) Stitch an opposite arc back to your start point to create a narrow leaf shape.


3) Stitch a line part way up the center.


4) Follow the center line back to the start point.
Don't worry about being too exact.
You have created one complete leaf shape. 
We'll add more later.


5) Stitch a larger, flame shape next to the leaf.
  

6) Echo up one side, touch the tip.


7) Echo back down to the start point at the center of the design.


8) To complete the petal stitch a medium sized teardrop shape with a smaller teardrop inside.
Return to the start point each time.


9) Repeat steps 5 through 8 to add two more equally spaced petals.


10) Now stitch a leaf in each of the remaining spaces between the petals. 
You have created one complete motif ending with the needle in the center.
To get to the start point for the next repeat stitch on top of your previous stitching until you reach the tip of any leaf .
This will allow you to "travel" in any direction.


11) Stitch the first leaf of the next repeat.
You are starting at the tip of the leaf this time so you will need to stitch from the tip to the center of the design and back to the tip to complete the leaf shape.
Stitch on top of the first line of stitching to get back to the center.
Add the vein to your leaf.


11) Repeat steps 4 though 10 to complete the motif.
Continue in this manner until you have filled the desired area.


Have fun stitching this design and remember... 
I love pictures!


Monday, 20 April 2020

This Giveaway Has A Winner


We have a winner in this giveaway to celebrate a triple milestone!

1) Julies Name Game has turned three.

This is where I create a new Free Motion Quilting design each week for you to help me name.
The designs are posted here, on Instagram and Facebook.
Click on the Social Media Icons underneath the Home Tab at the top of this page to Follow me. 

2) We have passed Design #150.

3) This blog passed 25,000 views.
Enter your Email on the top right of this page to Follow


To celebrate I hosted a giveaway to thank you for your continued support!

The prize includes three one meter cuts (just over 3 yards) of beautiful cotton fabric that would be perfect to show off your Free Motion Quilting skills as well as an artists journal for planning that next quilt and doodling your very own new designs.
  

There were lots of ways to enter keeping it light and fun.

All names were entered into a random name picker that would be used to select the winning name.

This random name picker went for a spin at 6:00 PM (Pacific) Wednesday April 15 ‘2020.

And the winner of this wonderful prize is .....
Jordan Tyler of Whistler B.C.

Congratulations Jordan!


Surprise !


I was having so much fun that I decided to take the random name picker for a few extra spins.

Each additional winner will receive a little surprise package from me.
All winners have been contacted and have messaged me with their addresses.


Congratulations to:

Lily Kent of Erskine, Western Australia

Barb Wain of Nanaimo, B.C. Canada

Leona Stolz of Thunder Bay, On. Canada

Brenda Grayston of Nanoose Bay, B.C. Canada 

Thank you to all for taking part and letting me know what your favorite designs are. 

I'll be announcing your top ten designs from the first 150 shortly. 

These will be used to create a new and exciting 
Free Motion Quilting class.

Here's to the next 150 designs.

Julie

Sunday, 19 April 2020

Julies Name Game - New Free Motion Quilting Design #161


Here is another fun design for you to stitch.

I used 50 weight cotton for this one.

I think it would be spectacular stitched quite large with 12 weight variegated thread.

It would also make a nice background fill with a finer thread.


There were many wonderful name suggestions and in the end it came down to a tie.


This new Free Motion Quilting Design has been named.


The winner was chosen by popular vote (Facebook and Instagram) with a little help from a random name picker 
at 6:00 PM (Pacific)  Sunday April 12, 2020.

Please welcome “Magnificent Magnolias”.

Thank you and congratulations to Philippa Zapf of Nanaimo B.C. for suggesting this winning name.


Follow these Step By Step Instructions To Stitch This Design


Please note that the photos may be turned to allow for greater visibility.

1) Stitch an arc.


2) Stitch an opposite arc ending back at your starting position. 
I like to extend the point a bit to form a slight flame shape.


3) Stitch a vein line that is about two thirds the length of your leaf.
A little bit of a curve adds personality.


4) Stitch roughly over top of the the previous vein line until you're back at the start position.
Don't worry about being too precise. 
The design will have more character if you just let it flow. 


5) Now stitch a curved line shaped like a gentle S on the right side of the completed leaf.


6) Follow the previous line for a few stitches or curve away immediately to leave some space in between the lines then curve in to finish at the start position .


7) Stitch a gentle reverse S curve on the left of the stitched leaf.


8) Stitch back to the start point as in step 6).
You have completed one full motif.


9) To travel and build the design stitch part way up either the right or left "arm" of a complete motif and start again.


As always... have fun experimenting!

Please feel free to post pictures of your work in the comments or Email them to me for the student gallery.

Classes available in both stitching and design.


Monday, 6 April 2020

Julies Name Game - New Free Motion Quilting Design #160


Here is a little free motion quilting diversion for you.

This new Free Motion Quilting Design has been named.


The winner was chosen by popular vote on Sunday April 5, 2020 at 6:00 PM (Pacific) from c
omments below, on Facebook and/or Instagram used to suggest a name or vote for your favourite.


Half the fun of this is that I never know what you will see in my designs.

This weeks design was inspired by a funny drawing of a rabbit done by my husband.

Many of you actually saw this but in the end the winning name was quite different.

Please let me introduce 
"Bee Bum Ballet"!

This charming winning name was suggested by  
Sherri Mullin Dawes of Nanaimo B.C.


Oh the fun we have !


Follow these free step by step instructions to stitch this design


The sample design was stitched with 40 weight Rayon thread.

1) Stitch a full circle.
Stop with your needle in the down position. 


2) Stitch an elongated oval shape.
Stop stitching when you come back to the circle. 
The bottom of the oval can come to a point or be flat depending on where you touch the circle.  


3) Stitch a little oval inside the first.


4) Travel a little way around the circle.


5) Now an oval like the first. 
If you line the base of the oval up to the circle the ovals will angle away from each other like a V.


6) A mini oval inside, like before.


7) You have completed one section of the motif.
Travel around the circle stitching on top of your previous stitching.
When your needle is just below the center of the first circle reverse directions and stitch a second circle.


8) Add the outer oval, inner oval, outer oval, inner oval as before.
From now on these oval combinations will be known as "wings".
Continue in this manner until you have five circle units that form a secondary circle.
This is one complete pattern.
The sample shown measures roughly 1½ to 2 inches across.

Isn't it cute ?


9) To start the next pattern stitch over top of the current stitching that forms the outside of a wing.
Stop when you reach the tip.


10) Stitch an oval or wing attached to the previous one.


11) Double stitch one side to bring you to the base of the wing.


12) Now stitch the inner oval.


13) Stitch a circle at the base of the wing then add the second wing.


 14) Continue in pattern to stitch the design.


Have fun with this one and remember to share your thoughts and photos in the comments !